Administration Manual WebUI
FTS has a web UI since version 1.5.
Please download the web UI manual here
FreeTAK Server User Manual
FTS V. 2.x
Nov 2023
Release
-
Introduction
Welcome to the user manual for the FreeTAKServer (FTS) Web User interface (webUI)!
FreeTAKServer, as of Release 1.9, provides Situational Awareness and other capabilities such as:
- Web administration
- Federation Service (Connecting two or more FTS instances)
- Data Package upload and retrieval
- Private data package (user to user)
- Image transfer and storage
- CoT recording in a database
- Execution of common task list (using the
ExCheckplugin forWinTAK;ATAKplugin only available to users with https://takmaps.com access) - SSL Encryption
- User Management
- REST API for creation of information such as emergency, Enemy units and so on
About the Web UI
FTS webUI allows administrators to easily manage the server.
This video, based on a pre-production version, provides an overview of most features described in the manual
https://www.youtube.com/watch?v=q4BpolzIDLw&ab_channel=%2aDA-B6%2a
WebUI is a completely separate application connecting to the FTS backend.
It uses an API to seamless query server functions. Depending on his deployment, may or may not be seen from remote machines.

Installation and configuration
This section provides an overview of the installation process. Refer to the online documentation for details.
To install FTS and the UI type in a console.
sudo python3 -m pip install FreeTAKServer\[ui]
Setup your Configuration
your administrator will need to configure the following files
- Config.py for the UI
- MainConfig.py for FTS
Start FTS
nohup sudo python3 -m FreeTAKServer.controllers.services.FTS
Start the WebUI
nohup sudo python3 /opt/fts.venv/lib/python3.11/site-packages/FreeTAKServer-UI/run.py
Basics
Login
Open a browser and navigate to [webUIIP]:[PORT].
For example 127.0.0.1:5000

Insert the user and password created with the function "System User" (see 4.1).
Click login
The function "Don't have an account? Create" could be useful to provide anyone with the link to the UI with the ability to create a System user. For security purposes it’s disabled in the standard configuration and his activation should be avoided.
First login can be done using:
- Username: admin (all non capital)
- Password: password (all non capital)
It’s strongly suggested to immediately create a new user and delete the generated one.
1.0 Navigation
To the Left of the main screen, there is a menu with 6 sub menus. These are: Home, Mission, User, Connect, Configure and About.
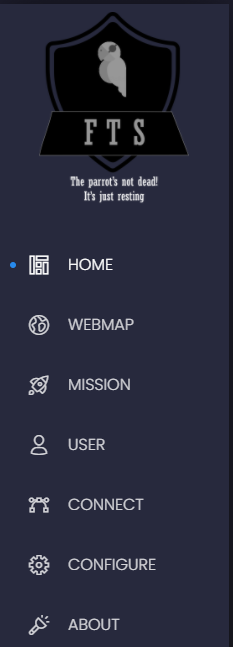
Each of these is linked to a different screen with specific information to be seen and edited. The current section is highlighted with a blue dot
- Home: System status
- WebMap: a web client displaying all is sent to your FTS server
- Mission: Data Packages and other files
- User: UI users and groups configuration
- Connect: send CoTs and system messages
- Configure: Services and federated servers
- About: FTS and web UI version and special thanks
1.1 Top Navigation Bar

The Events button is currently inactive. It provides a list of the last 5 events.
The user button allow to log out or to edit the current user Profile
1.2 Profile Screen

Use this screen to change the current login user password, token and group.
2.0 Home
Here the main information about FTS can be visualized.
This information is periodically updated from the server.
You can change this period in the UI configuration [UIInstallation]/UI/app/__init__.py.
. Default, expressed in milliseconds are
- USER INTERVAL= '180000'
- SERVER HEALTH INTERVAL = '180000'
- SYS STATUS INTERVAL = '600000'
2.1 System Status
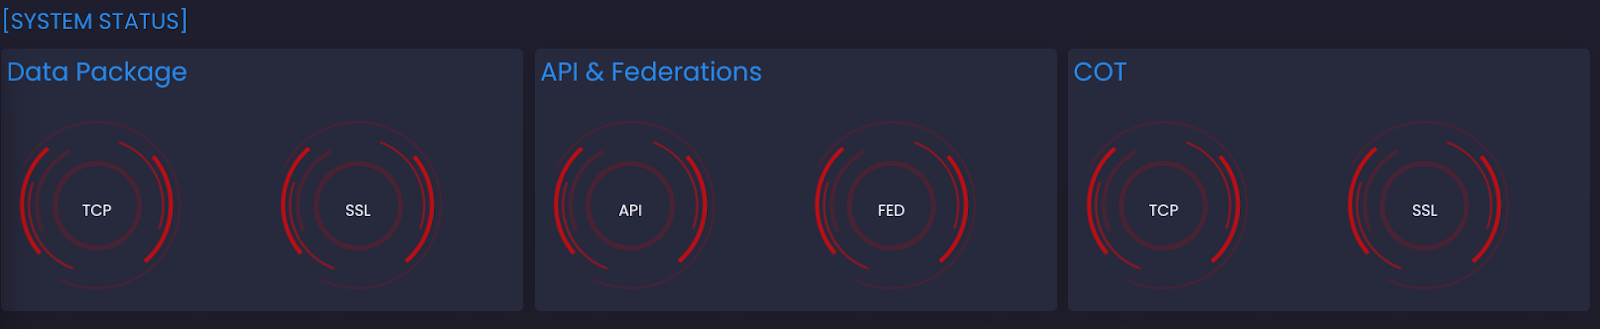
The status of FTS services is visualized as a series (6) of rotating concentric circles. The information is color coded:
- Blue: Service is running and activated
- Red: Service is activated but not running (screenshot)
- Gray: Service is turned off (See 5.1 System Configuration)
2.2 Run Time & connected clients

This section shows the start and current run time of the FTS, and the number of connected clients. The start time is provided by the server, so if you are in a different time zone you may see negative uptimes.
2.3 System Health
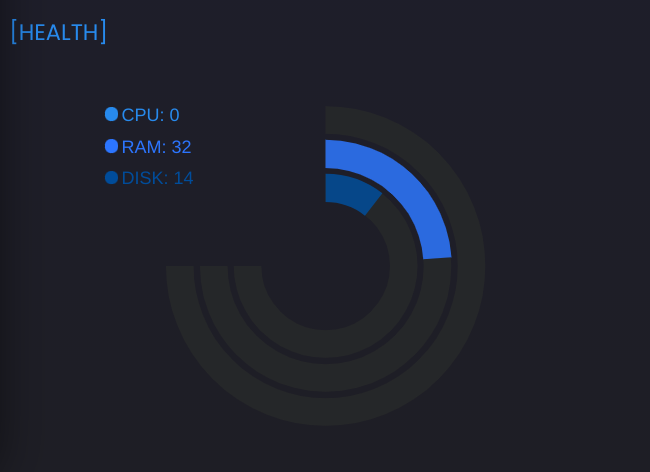
In this section the % resources required by the server are displayed as its consumption of CPU, RAM, and Disk. The gauge shows both numerical (RAM: 32) and visual (circle ~⅓ full) values.
2.4 Logs

Last Errors and other log messages will appear here
3.0 WebMap
Since FTS 1.8, the UI has a Tab to a webMap. The webmap is a separate component, part of the FreeTAKHub concept (seehttps://github.com/FreeTAKTeam/FreeTAKHub for more details)
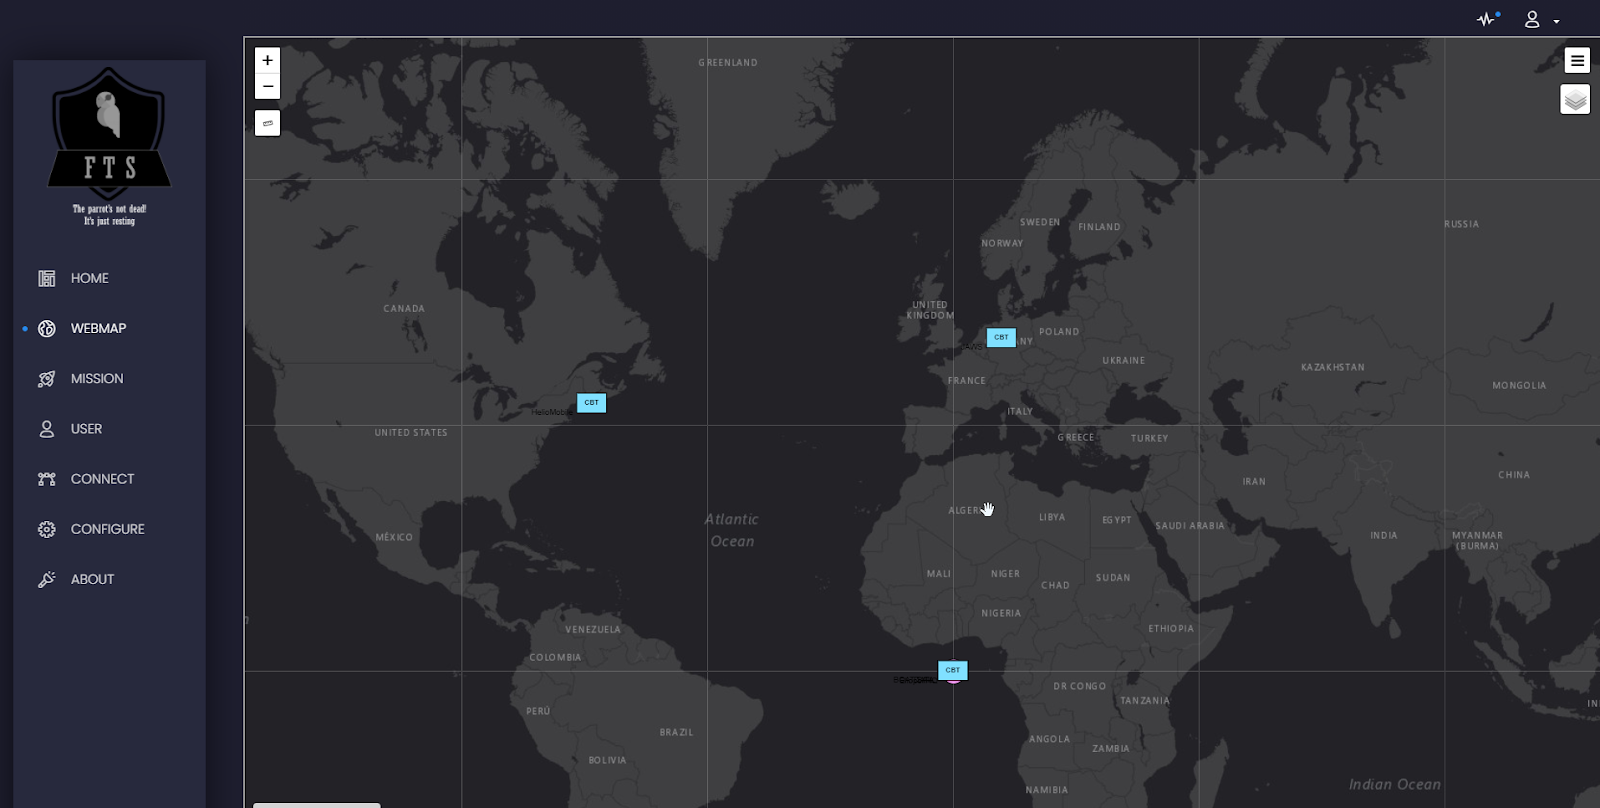
The webmap is a partial TAK client only. It displays all the connected clients and the CoT sent from the moment in which it connects. Clicking on another tab closes the webmap, no memory of past events is kept.
3.1 Webmap Special functions
Following functions are also available:
- Zoom in and out
-
Measure distances and bearing
-
Import KML
-
Drag and drop a valid KML into the map to display it (server only, not shared with clients)


-
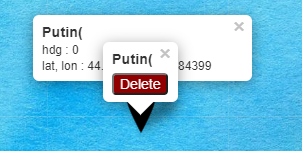
Add markers to the map (right click) and send to all the connected clients
-
Attitude: the attitude of the target toward the users, reflected in the color
- Type: Basic infantry types are supported
- Timeout: time before the markers disappears in seconds
-
Name: unique name of the marker, if the same name is re-used, it will move an existing marker
-
Delete an existing Marker
- Search CoT by name
- Search geolocation
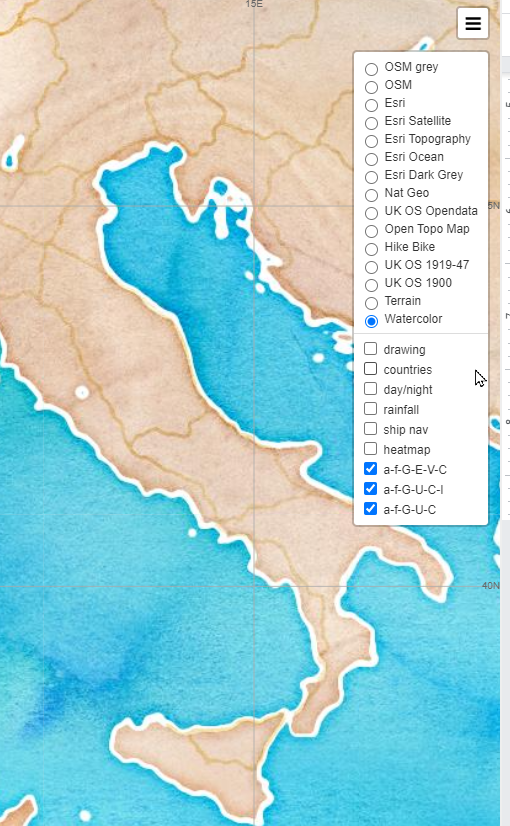
- Select different map styles


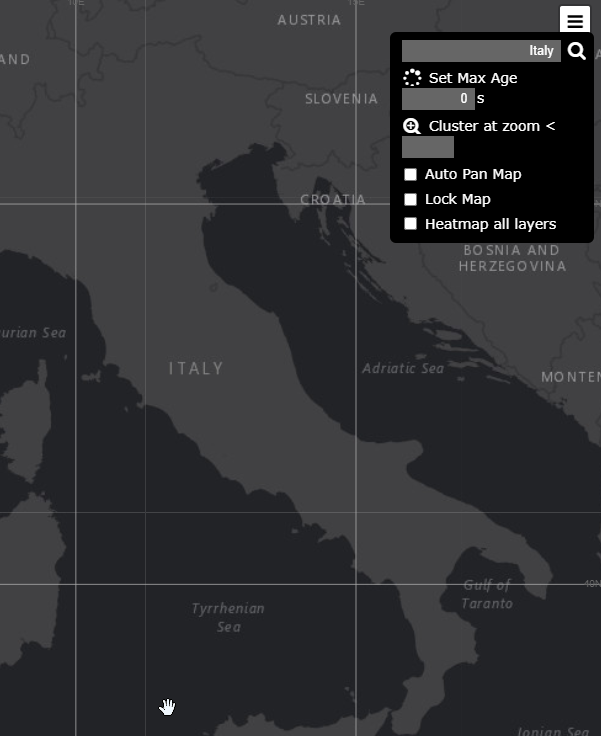
- Filter CoT's by type (each CoT type is placed in a layer)

4.0 Mission
A multipurpose section with a broad role in managing data and files
4.1 Data Packages

From here one can see, add, download, delete and hide available data packages.
- Add: By pressing on the three dots in the bottom right of the menu, a dialogue will appear with your file explorer. Select the Zip file meant for upload and click on "open". The dialogue will close. Now click on "add" (next to "delete" at the bottom left) and the file will be uploaded as a data package.
The default maximum size for a Data Package is 15 MB.
You can change this size in the UI configuration [UIInstallation]/UI/app/__init__.py.
- Download to local drive: Simply click on the data package name in blue. The file will be downloaded to your "downloads" folder
- Delete: This can be done by selecting the undesired data packages (click anywhere except the blue name), the delete button will change to indicate the # of selected rows. Click "delete" (bottom left)
- Index: the unique index number of the Data Package in the DB
- Hide: The fourth information column from the right is labeled as "is private". This function allows you to hide data packages from
ATAK/WinTAKusers simply by checking the box in this column. All private data packages, exchanged between clients, are listed as private - QR code:opens a special image that contains the URL of the DP package. Useful to share certifications (see System Users).Notice, the QR code will appear in a new windows, check out your Adblock or similar tools to ensure that the message is not blocked
4.2 Mission / Data Sync

For future development,currently non-functional.
Will allow users to share data packages, CoTs and ExCheck lists with others, organized in "missions".
Still under development as of this version of FTS (V 1.9).
4.3 ExCheck
ExCheck allows users to collaborate on the execution and monitoring of tasks based on templates.
To use ExCheck, you need to have a server that supports it.
FTS supports the plugin since version 1.3.
See this article for an example of how to use it:
https://www.reddit.com/r/ATAK/comments/jzltvt/use_freetakserver_and_excheck_plugin_to/

Allows you to see, add and delete ExCheck templates.
- Add: Add: By pressing on the three dots in the bottom right of the menu, a dialogue of your file explorer will appear. Select the file meant for upload and click on "open". The dialogue will close. Now click on "add" (next to "delete" at the bottom left) and the file will be uploaded as a data package.
The uploaded template must be valid in an XML format.
- Delete: This can be done by selecting the undesired data packages, and then clicking on "delete" (bottom left)
4.4 Federation
The federation function allows FTS to connect to another server of the TAK family and exchange information such as CoT and chats. The current implementation (1.9) does not allow sending Data packages and Missions yet.
4.4.1 Federating to a legacy TAK server
To set up a federated connection with another server you need to upload the certificate authority to the target server.
Under the certs directory there's a file called pubserver.pem containing your server public certificate.
Download this file, rename it to something easy to remember like FTS204.134.0.60.pem
and upload it to the Legacy TAK server you want to federate to.
4.4.2 Federating to a FTS server
- On the federated server: Activate the Federation service under Configure/system configuration
- On the federated client: Simply create the connection to the federated server as described below

Here one can see the status of federated servers the current instance connects to, as well as deleting, editing and adding news ones.
- Add: Pressing the "Add" button will open an extension of the window. In the correct slots, fill out the pertinent information (Name, IP Address, and Port). Additionally, you can add a fallback (backup) server, by enabling or disabling the option. In the current version (1.5 this is not yet active) Press submit once finished.
In the event the status remains disabled it is likely there was an error in the creation of your federation, the associated error message can be found in the farthest right most column of your federation (you may need to scroll to the right to see it).

- Editing: When selecting the desired server, a new button labeled "editing" will appear next to "delete" (bottom right of panel). Pressing this will enter the information of the selected server in the otherwise blank fields. Information can now be edited to desired values.
- Delete: This can be done by selecting the undesired federation and then clicking on "delete" (bottom right)
5.0 User
Allows the user to add or delete System Users and edit user group permissions.
5.1 System users
This panel shows all the registered users of the UI and allows the user to add and delete users. A System User, other than an anonymous one is associated with a group, a Token for API, a password that can be used to log in into the ui and finally certificates allowing to securely connect to FTS

-
Add: This can be done by clicking on the "add" button (bottom right of panel). An extension will appear, with empty fields for the new user’s name, group, token and password.
-
Name: name of the created user. For the certs deployment to work must be the same as a connected user (see below)
-
Group: group of individuals this user belong to (team a, team b, team c)
-
Token: gives a unique combination that this user can leverage for the FTS REST API. NOTICE: the field token is for any alphanumeric string. the prefix 'bearer' is NOT part of the token. The name "Bearer authentication" can be understood as "give access to the bearer of this token."
-
Password: unique password that can be used for interact with the FTS
-
Certs: true/false. If true certs will be generated (see below)
When creating a user In the UI, you will find a new flag. By selecting "mobile" you will generate and push a certificate that should work with:ATAKiTAKTAK Tracker
in alternative selecting desktop will generate and push a certificate for WinTAK
Once the fields have been filled, simply press submit to add a new user.

- Delete: This can be done by selecting the undesired user and then clicking on "delete" (bottom right). You can only delete one user each time. Since version 1.9 when you delete a user that has a certificate, the certificate will be invalid.
5.1.1 Automate certificates creation and deployment
TAK clients can connect to a server using TCP or secure connection (SSL), this requires the creation of valid certification on the server that needs to be deployed to each client.
FTS supports an advanced system to generate and distribute valid certification.
When creating a system user, by leaving "certs" on "true", the user will automatically be notified of his new connection, but only if he is connected to the same server at that moment.
FTS will:
- Create a system User (e.g. Joe)
- Generate valid Certificates
- Package the certs into a zip file with the same name of the user (e.g. Joe.zip)
- Create a private Data Package. This can be seen in the Mission section, with the other Data Packages
- Send the private DP automatically to a
ATAK/WinTAK(or compatible client) - To the user with the same name (Joe)
The user will receive a notification of the reception - Under "manage server connection" a new entry with the nameFreeTAKServer_[SERVERIP] will appear.
- The user needs to activate the connection (in
WinTAKhe may need to restart the software)
Since
ATAK4.6 the ability to use non-secured data packages has been disabled.
5.1.2 Alternate certificates distribution
If the user is not online at the moment of the certs creations, it’s possible to deploy the certifications by:
- Download the data package and use another type of secure transportation
- As soon the user is online, set the certification Data Package to be public, allowing the user to download it and then changing it back to private
5.1.3 Deactivate Certification
Since FTS 1.9 it’s possible to deactivate a certification by deleting the associated user. The next time the user tries to connect to the server using the certifications, will get anIO error.
5.2 Group Permissions
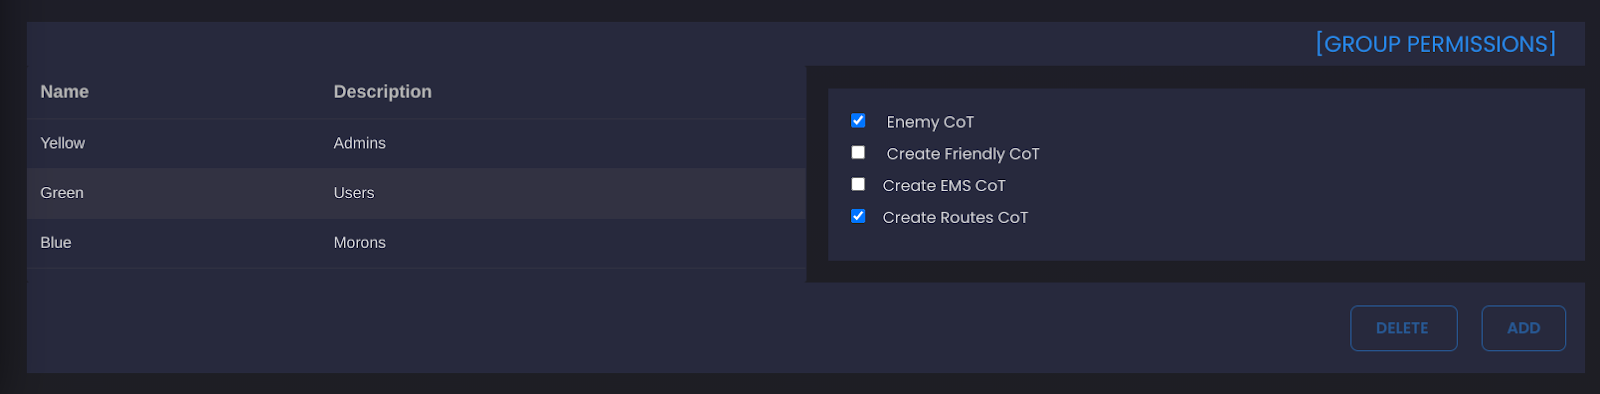
Future functionality, not currently active. Allows to create and assign permission to groups. When activated, will filter what a user can receive from FTS.
6.0 Connect
A menu that can be used to create Center Of Target (CoTs) using a "Human API" and send system messages to FTS users. This is a User interface to some of the FTS Public UI (see https://freetakteam.github.io/FreeTAKServer-User-Docs/API/REST_API_Doc.html for complete description of the API)
6.1 Send CoT
Can be used to create a CoT (also called a geoObject)
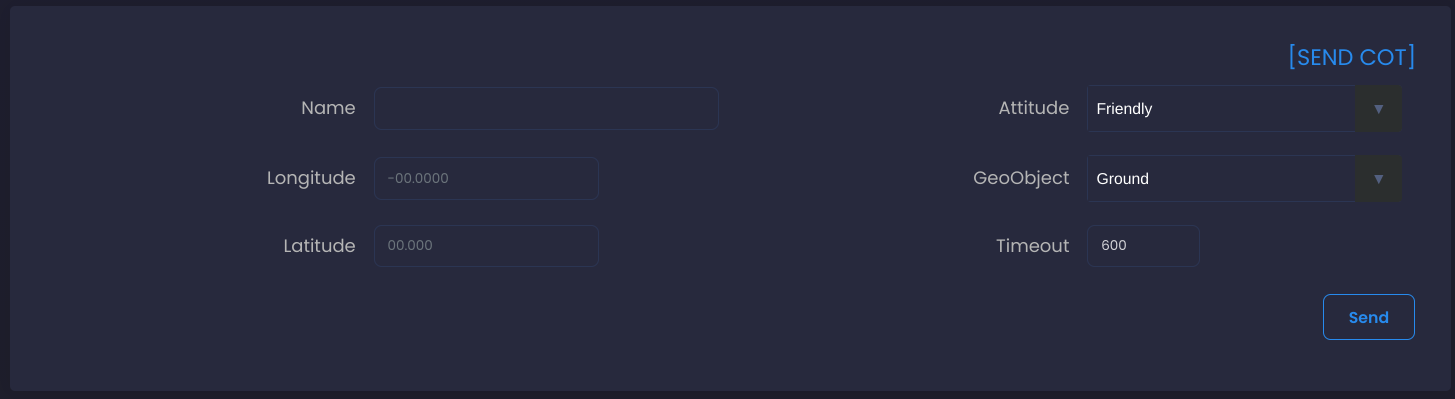
fill out the fields with the desired values.
- Name: geoObject name that will display on map
- Longitude/Latitude: Determines where the object will appear
- Attitude: Sets the colour and external shape (and thus faction) of the geoObject based on MIL-STD-2525D
- GeoObject: Changes the shape and type of the object (ex: sniper, grenadier)
- Timeout: The length of time the object appears, measured in seconds
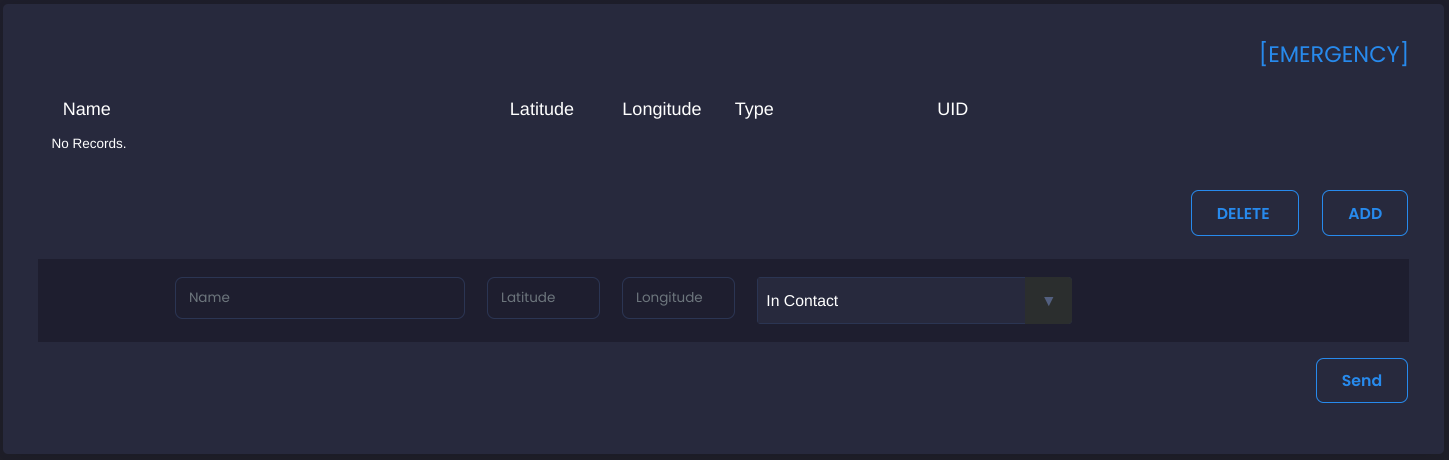
6.2 Emergency
Allows to see, delete and create new emergencies on the server
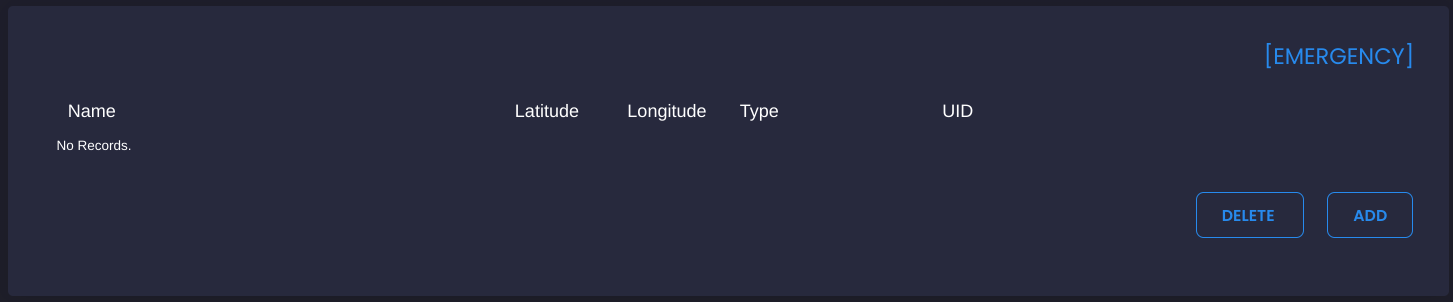
- Delete: This can be done by selecting the undesired data packages and then clicking on "delete" (bottom right)
- Add: Start by clicking the "add" button at bottom right. An extension of the panel will appear. Simply fill out the pertinent information (name, location in longitude/latitude, type of emergency). Press "send" once finished
6.3 Manage Presence
Using this function, the user can create a custom team member (friendly Dot) on the ATAK map,
who will however appear like a real TAK user.
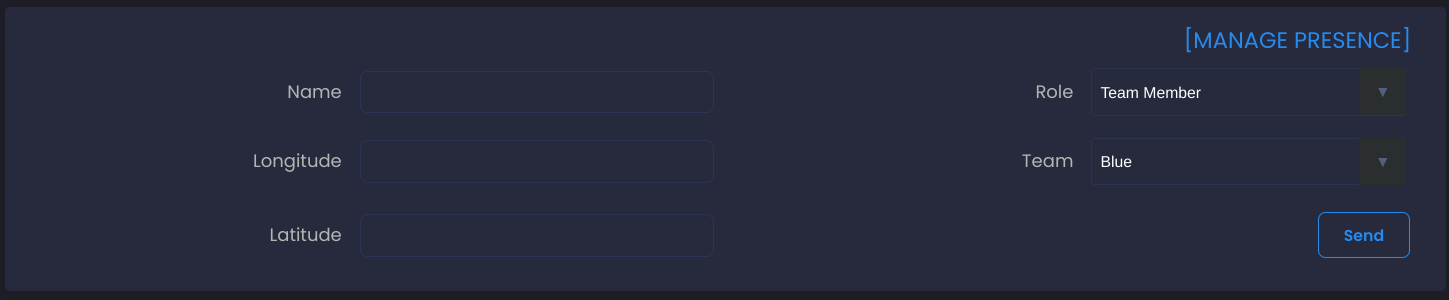
To create a new member simply fill out the fields with the proper information. Once finished, press "send" (bottom right of panel).
6.4 Message
This function allows users to send system messages to all connected TAK clients.

To send a message it suffices to enter the message in the top field, and then specify the sender name in the field marked "sender". Once finished, press "Send".
7.0 Configure
Used to configure services and federated servers.
7.1 System Configuration
Here the services can be turned on and off and a port can be assigned to the service.
The Data Package IP is initially determined by the starting parameter of FTS.
sudo python3 -m FreeTAKServer.controllers.services.FTS -DataPackageIP 204.48.30.216 -AutoStart True
FTS supports following services:
- TCP CoT: used when a client connects with regular TCP
- SSL CoT: used when a client connects with an encrypted channel
- HTTP DP: Data package function over HTTP
- SSL DP: Data package function over an encrypted channel
- API: the Public REST API. Allows to send data over REST for integration with other systems. If deactivated some function of the WebUI will not work
- FED: Federation function, allow to create outgoing connections to other TAK servers
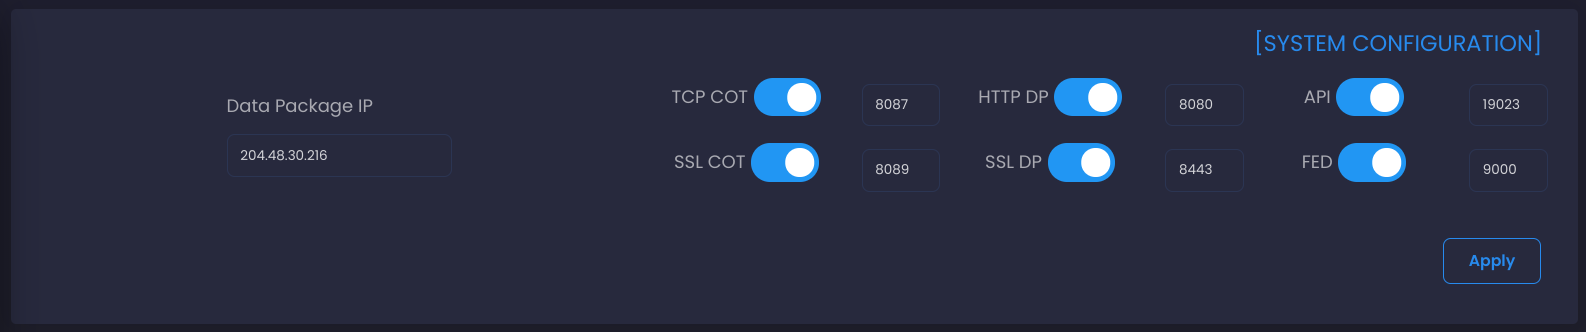
To turn a service on and off:
- click on the slider of the desired service
- Click ‘apply’
To change a service port:
- Move the slider to stop the service
- Click ‘apply’
- Change value of the port
- Click ‘apply’
- Reactivate the service by moving the slider
- Click ‘apply’
7.2 Outgoing Federations
See 4.4 Federations.

8.0 About
FTS and UI version notes and special thanks

7.1 About FTS
A description of the software
7.2 FTS and UI version
Current running version and IP, important when reporting bugs
7.3 Credits
A list of individuals and organization that have contributed to FTS
7.4 Open Source Note
A list of libraries and other projects being used